Article Summary: Want a beautiful, low-maintenance lawn? This guide explains how to install artificial grass from start to finish, including tips for cutting, seaming, and securing your turf.
Follow these steps for a clean, professional-looking artificial turf installation that lasts.
Thinking of making the switch to fake grass? Whether you’re tired of mowing or just want a lawn that looks great year-round, installing artificial grass is a practical, low-maintenance option for homeowners, pet owners, and even commercial properties.
But while it’s much easier to care for than natural grass, getting it installed correctly takes a bit of planning and precision. In this guide, we’ll break down how to install artificial grass step by step—including how to prepare your base, cut and fit synthetic grass, and finish with a clean, seamless look.
Before diving into the process, it’s worth considering why more people are installing synthetic turf:
Ready to learn how to install artificial turf on dirt or other surfaces? Let’s go step by step.
Start by measuring your yard or installation area to determine how much synthetic turf you need. Make sure to account for extra turf to cover odd shapes or make precise cuts later.
Tools you’ll need:
Next, remove any natural grass, roots, weeds, or debris. Use a shovel or sod cutter to clear out about 3–4 inches of soil. This allows room for the base material that provides drainage and support for the turf.
Pro tip: If you’re wondering how to install artificial turf on dirt, this is the critical step that preps your ground for a proper base.
After clearing the area, add your base material—usually crushed rock or decomposed granite. Spread it evenly across the area to about 2–3 inches thick.
Then, compact the material using a plate compactor or hand tamper. A firm, level surface is essential for the turf to look smooth and last long.
To help stabilize your base rock and prevent weeds from growing up through your turf, consider adding a weed barrier fabric between the base layer and the dirt. This is especially helpful in areas with aggressive weeds or long-term installations.
Unroll your synthetic grass and let it sit in the sun for a couple of hours. This helps relax the material and reduces creases.
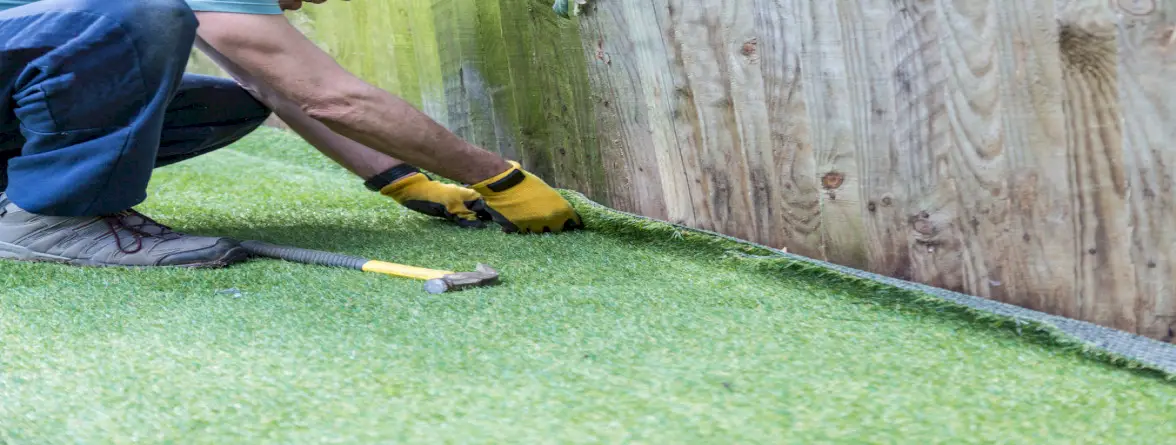
When fitting artificial grass, make sure the blades are all facing the same direction for a consistent look. Lay it loosely over the surface, with a few inches of overlap at edges and seams.
Use a utility knife with a sharp blade to trim the turf around edges, curves, and obstacles like trees or fences.
Tips for cutting and fitting:
Cutting and fitting artificial grass accurately ensures a tight, clean finish.

If your project involves more than one roll, you’ll need to seam them together.
Steps for seaming artificial turf:
Strong, invisible seams are crucial for a high-quality artificial turf installation.
After positioning and cutting, it’s time to secure the turf. Use turf nails, landscape staples, or outdoor adhesive depending on your base surface.
Tips for securing:
Properly installing turf means anchoring it so it doesn’t shift, wrinkle, or bunch.
Adding infill—like silica sand or rubber granules—helps keep blades upright, adds cushion underfoot, and improves drainage.
Use a drop spreader to apply infill evenly, then brush it into the turf using a stiff broom.
Benefits of infill:
To finish your artificial grass installation, brush the turf fibers against the grain using a stiff broom or power brush. This lifts the blades and creates that soft, natural look.
Check for:
Take your time in this final step to perfect the appearance and function of your fake grass installation.
While maintenance is minimal, some care helps extend the life of your new lawn:
With simple upkeep, your synthetic turf can last 10–20 years looking just as good as the day you installed it.
Learning how to install artificial grass isn’t overly complicated—but it does require attention to detail. From removing natural grass to cutting, securing the turf, and fitting artificial grass accurately, each step plays a role in ensuring your lawn looks lush, level, and long-lasting.
Whether you’re working on a small patio space or a full backyard transformation, following these best practices for installing synthetic turf will help you achieve a professional finish—without the professional price tag.
Get started with the perfect artificial grass for your yard!